Fly fishing is not just a sport; it’s an art form that combines patience, technique, and creativity. One of the critical components of this art form is crafting the perfect fly. A fly that is specifically designed to attract fish is termed an “Attractor Fly.” At its core, an attractor fly is designed not to mimic a specific insect or organism but to provoke a reaction from fish through its vibrant colors, movements, and design. Attractor flies can be particularly effective in situations where water clarity is low, making it tough for fish to spot natural food sources. Whether you are a seasoned angler or a newbie, knowing how to tie these enticing flies can make a significant difference in your fishing success.
In this article, we’ll dive into the fascinating world of attractor flies. You’ll learn the intricate art of fly tying, from understanding what makes an ideal attractor fly to the techniques and materials you’ll need to create your own. Let’s get started on this exciting journey to becoming an attractor fly-tying expert!
What Makes an Attractor Fly Effective?
Attractor flies are unique in that they do not represent any specific insect but are designed to provoke a strike from a fish. The primary elements that make attractor flies effective are color, flash, and overall design. Bright and contrasting colors like red, yellow, and orange, along with flashy materials like Mylar and tinsel, make these flies highly visible underwater. The intention is to trigger the predatory instincts of fish, making them attack out of aggression rather than hunger.
Size also plays a crucial role in the effectiveness of an attractor fly. Depending on the type of water you’re fishing, the size of the fly can vary significantly. Large flies are often used in murky waters or fast-flowing streams, while smaller ones work better in clear, slow-moving waters. The overall design of the fly can follow traditional patterns such as Wooly Buggers, Royal Wulff, and Stimulators, or you can experiment with your unique variations.
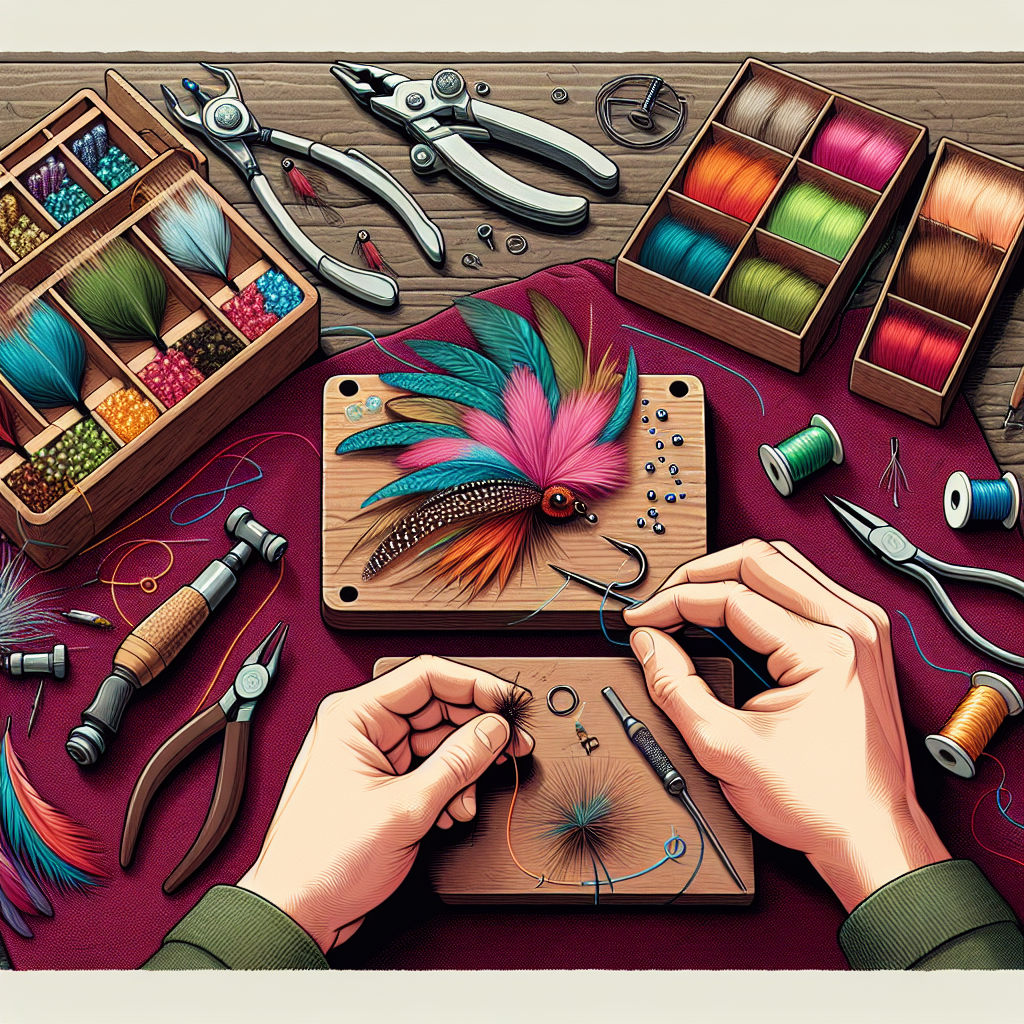
Materials Needed for Tying Attractor Flies
Before you get started with tying attractor flies, it’s essential to gather all the necessary materials. Having the right tools and materials can make the process much easier and more enjoyable. Here’s a basic list of what you’ll need:
- Hooks: Choose a size and style appropriate for the fish you’re targeting.
- Thread: Strong and lasting, available in various colors to suit your fly’s design.
- Feathers: Saddle hackle, marabou, and synthetic feathers work great for adding color and movement.
- Tinsel and Mylar: For adding sparkle and flash to your flies.
- Beads and Dumbbell Eyes: Added weight and visual appeal.
- Adhesives: To ensure durability of your ties.
- Fly Tying Vise: Holds the hook in place while you work.
- Bobbin Holder: Keeps your thread under tension and easy to manage.
- Scissors: For trim work and cutting materials to size.
Having these essentials at hand will enable you to get started right away on creating your attractor flies.

Basic Fly Tying Techniques
To tie attractor flies effectively, you need to master a few basic fly tying techniques. Let’s break down some of the fundamental skills:
Thread Wrapping: Learn how to secure your thread to the hook shank. This foundational step ensures that all other materials you add will stay in place. Begin by wrapping the thread around the hook shank, starting behind the eye and working down toward the bend. Overlapping wraps will strengthen the base.
Securing Materials: When securing materials like feathers, tinsel, or dubbing, it’s crucial to make firm wraps while maintaining an even distribution. Tie in materials using your thread and secure them with a few tight wraps to ensure they stay in place during casting and retrieval.
Whip Finish: The whip finish secures your fly and prevents it from unraveling. Using a whip finisher tool or your hands, make a series of wraps that lock the thread in place. This is typically done at the head of the fly, near the eye of the hook.
These basic techniques form the foundation of more complex fly tying skills and will serve you well as you delve deeper into the art of creating attractor flies.
Tying the Wooly Bugger
The Wooly Bugger is one of the most versatile and effective attractor flies in fly fishing. It mimics a wide range of prey, from small fish to leeches, and can be tied in various sizes and colors. Here’s a step-by-step guide to tying a basic Wooly Bugger:
- Start with the Hook: Place the hook in your vise and start your thread near the eye, wrapping it back to the bend of the hook.
- Attach the Tail: Take a marabou feather and tie it in at the bend to form the tail of the fly. The tail should be about the length of the hook shank.
- Add the Body: Tie in a chenille or a wool yarn at the base of the tail. Wrap the materials forward in overlapping turns, stopping a few millimeters behind the eye.
- Wrap the Hackle: Select a saddle hackle feather and tie it in near the base of the tail. Wrap it forward in evenly spaced turns, and secure it just behind the eye.
- Finish the Fly: Complete the fly with a whip finish, securing the thread behind the eye. Trim any excess materials, apply a small amount of head cement to ensure durability, and your Wooly Bugger is ready for action!
Mastering the Wooly Bugger is a fantastic way to start your journey into tying attractor flies. It’s simple yet effective, making it a go-to pattern for many fly fishermen.
Advanced Techniques: Adding Flash and Weight
As you become more confident in your fly tying abilities, you might want to experiment with adding extra flash and weight to your flies. These enhancements can make your attractor flies even more effective. Here’s how:
Adding Flash: By tying in strands of Mylar or tinsel, you can enhance the visibility of your fly underwater. Attach these materials alongside your body materials, ensuring they are evenly distributed for a balanced appearance.
Incorporating Beads and Dumbbell Eyes: Adding weight to your attractor flies helps them sink faster, which can be beneficial when targeting fish that are feeding at deeper levels. Slide a bead onto the hook before starting your thread or tie in dumbbell eyes using figure-eight wraps for secure attachment.
These advanced techniques allow you to customize your flies based on the specific conditions and fish you’re targeting, providing a more versatile arsenal for your fly fishing adventures.
Tips for Success in Fly Tying
To become proficient in fly tying, it’s helpful to adhere to these practical tips:
Practice Regularly: As with any skill, practice makes perfect. Set aside time each week to tie flies and refine your techniques.
Study Natural Insects: Although attractor flies don’t mimic specific insects, understanding the natural prey in the habitats you’re fishing can inspire effective designs.
Stay Organized: Keep your tying area neat and your materials organized. This will make the process easier and more enjoyable.
Seek Feedback: Join a local fly fishing club or online community where you can share your flies and get constructive criticism from experienced tyers.
By following these tips, you’ll improve your skills and create highly effective attractor flies that can make a difference on your next fishing trip.
Conclusion
Tying your own attractor flies is a rewarding aspect of fly fishing that allows you to engage with the sport on a deeper level. From understanding what makes attractor flies effective to mastering basic and advanced tying techniques, each step offers a new avenue for creativity and skill development. Whether you stick with classic patterns like the Wooly Bugger or venture into designing your own, the end result is the satisfaction of crafting a fly that can bring you success on the water.
Remember, fly tying is both an art and a science. Don’t be afraid to experiment and make mistakes – that’s part of the learning process. With time, practice, and patience, you’ll find yourself not only enjoying the craft more but also reaping the rewards during your fly fishing adventures. Happy tying, and may your next attractor fly land you that trophy fish you’ve been dreaming about!


