Building your own fly rod is one of the most rewarding advanced techniques in fly fishing because it combines tackle performance, hands-on craft, and a deeper understanding of how casting tools actually work. A custom build is not simply a cheaper alternative to a factory rod. It is a way to choose blank material, action, handle shape, guide layout, thread wraps, and finishing methods so the final rod matches your casting stroke, target species, line system, and fishing conditions. I have built trout, bass, steelhead, and saltwater fly rods on graphite, fiberglass, and composite blanks, and the biggest lesson is consistent: careful planning matters more than expensive components.
In practical terms, building your own fly rod means assembling a rod blank with a grip, reel seat, guides, tip-top, hook keeper, winding check, thread wraps, and protective finish. Advanced techniques go beyond basic assembly. They include spine evaluation, static guide placement, handle ergonomics, epoxy control, thread tension management, ferrule alignment, balancing swing weight, and tuning a rod for a specific line grain window. These details affect casting accuracy, loop stability, mending efficiency, and long-term durability. A well-built rod feels clean in hand, tracks straight, protects tippet, and recovers predictably under load.
This topic matters because modern fly rods are highly specialized. A 3-weight small-stream rod, a 6-weight stillwater rod, and an 8-weight saltwater rod all ask for different design choices. Anglers who learn rod building gain more than a custom tool. They learn why one rod feels crisp, another feels deep-loading, and a third struggles with line control in wind. That knowledge improves buying decisions, maintenance habits, and on-water problem solving. As a hub for advanced techniques, this guide explains the major decisions, the build sequence, the common mistakes, and the performance tuning concepts that serious anglers should understand before starting a custom fly rod project.
Choosing the right blank and defining rod performance
The blank is the rod’s engine, so advanced rod building starts by defining use case before ordering parts. Length, line weight, action, material, and ferrule design all drive final behavior. For dry-fly trout work, many builders favor 8’6″ to 9′ rods in 4- or 5-weight with medium-fast actions that protect light tippet and offer precise presentations. For indicator nymphing or stillwater, a 10′ 4- to 6-weight blank gives better line control and reach. For streamers, warmwater, and light salt, a 6- to 8-weight fast-action graphite blank handles heavier flies and wind better.
Material choice changes feel as much as line rating. Graphite remains dominant because it is light, sensitive, and efficient, especially in high-modulus designs, but higher modulus blanks can be less impact resistant if abused. Fiberglass bends deeper, recovers more slowly, and excels when anglers want close-range loading feedback or fish-fighting cushioning. Composite blanks split the difference. In my builds for small creeks, S-glass has been outstanding when roll casting under canopy mattered more than distance. For boat-based bass fishing, fast graphite blanks with strong butt sections have consistently delivered cleaner pickup-and-shoot casts.
Do not choose a blank only by marketing labels like “fast” or “progressive.” Compare manufacturer line recommendations, grain windows if available, blank weights, butt and tip diameters, and intended fisheries. Reputable suppliers such as Rainshadow, NFC, CTS, Epic, and MHX publish meaningful specifications. If possible, cast a finished rod built on the same blank. If you cannot, study independent builder forums, Common Cents System measurements, and deflection videos. Matching blank character to your real casting stroke prevents the most common custom-build disappointment: a technically flawless rod that simply does not fish the way you hoped.
Components that affect fit, balance, and durability
Once the blank is selected, component choice determines how refined the final rod feels. Guides should match expected use. Hard chrome snake guides remain standard for freshwater durability and low weight, while titanium stripping guides shine in saltwater because they resist corrosion. Ceramic stripping guides reduce line friction and are especially helpful on rods that shoot long heads or textured lines. Most trout rods use one or two stripping guides; heavier rods often benefit from larger first strippers to manage thicker fly lines and knots.
Grip shape matters more than many first-time builders realize. A full wells grip suits heavier rods because it supports thumb pressure and hauling leverage. Half wells grips remain popular for trout rods under 6-weight. Reverse half wells and cigar grips can work beautifully on lighter rods where touch and wrist freedom are priorities. Cork quality is worth paying for because pits, filler loss, and soft spots become obvious quickly in hard use. Flor-grade cork is not mandatory, but poorly turned bargain grips often need enough rework that they stop being bargains.
Reel seats should match both environment and reel foot fit. Uplocking seats help on many modern trout rods and can shift balance slightly toward the hand. Downlocking seats still appeal on lighter rods, particularly traditional builds. Aluminum seats are practical and durable; wood inserts add visual warmth but need proper sealing and sensible use. Tip-tops, winding checks, trim bands, and hook keepers are smaller decisions, yet they influence finished quality. A clean, aligned tip-top and snug winding check give the rod a professional look. Sloppy hardware transitions make even expensive builds look unfinished.
| Component | Best Use | Key Advantage | Main Tradeoff |
|---|---|---|---|
| Graphite blank | Most freshwater and saltwater builds | Low weight and fast recovery | Can be less forgiving to impact |
| Fiberglass blank | Small streams, short casts, classic feel | Deep flex and tippet protection | Heavier swing weight |
| Titanium guides | Saltwater and premium freshwater rods | Corrosion resistance and lightness | Higher cost |
| Full wells grip | 6-weight and heavier rods | Power and hauling control | Less delicate feel on light rods |
| Uplocking reel seat | Modern trout and all-purpose rods | Secure fit and familiar balance | Slightly more hardware weight |
Guide spacing, spine, and alignment techniques
One of the most discussed advanced techniques in fly rod building is whether to build on the spine or on the straightest axis. In practice, most experienced builders prioritize straightness for fly rods because accurate tracking and clean visual alignment matter more than the modest force bias of the spine. I still locate the effective spine on every blank section by flexing it under light pressure on a smooth surface, but I use that information alongside straightness rather than letting it dictate the build automatically. On multi-piece blanks, ferrule alignment often makes this a practical compromise.
Guide spacing should never rely solely on the generic chart included with a blank. Manufacturer charts are a starting point. Static load testing refines them. Tape on guides, run line through the train, apply moderate load, and study how the line follows the rod curve. You want even stress distribution without sharp unsupported angles, especially near ferrules and in the upper third of the blank. If a section shows a large gap between line path and blank under load, add or move a guide. This step materially improves load transfer and fish-fighting smoothness.
Alignment discipline separates clean custom rods from amateur builds. Mark centerlines with a white china marker or silver pencil that can be removed later. Dry fit every section repeatedly. Sight down the blank from butt to tip under bright light before wrapping. Check stripper guide orientation relative to reel seat hardware, then confirm snake guides section by section. I also rotate the assembled rod during setup to catch tiny visual errors that appear only from certain angles. A guide train that is one degree off may still fish, but it will bother you every time the rod comes out of its tube.
Handle fitting, reel seat installation, and adhesive control
Installing the grip and reel seat is the structural heart of the build. The biggest mistake is forcing a grip that has been over-reamed or under-reamed. Ream slowly with proper tapered reamers or abrasive reaming tools made from old blanks. Test fit often. The grip should slide with firm resistance to its final position without wobble. If you remove too much material, you create glue gaps that can weaken the bond and let the grip twist over time. On expensive cork or carbon grips, patient fitting is mandatory.
Arbor choice is another advanced point. For reel seats with larger inside diameters, use polyurethane arbors, masking tape arbors with full epoxy coverage, or premade graphite arbors depending on seat design and blank taper. I prefer solid polyurethane or graphite arbors where possible because they create predictable support and eliminate hollow voids. Slow-cure two-part paste epoxies such as U-40 Rod Bond are widely trusted because they provide working time, gap filling, and strong adhesion. Five-minute epoxies are convenient but too unforgiving for most full-handle installations.
Adhesive control is as important as adhesive selection. Dry fit every part in sequence before mixing epoxy. Mark insertion depths. Coat both blank and inside surfaces evenly. Rotate components into place to spread adhesive, then remove squeeze-out immediately with isopropyl alcohol on a lint-free cloth, being careful around unfinished cork. Check reel seat orientation against guide marks before the epoxy begins to set. During my early builds, I learned that a reel seat aligned a few minutes late is usually aligned forever. Slow, deliberate setup prevents permanent cosmetic and functional errors.
Wrapping guides and applying finish like a professional
Threadwork is where craftsmanship becomes visible. Consistent tension, smooth packing, and clean tag management matter more than decorative complexity. Nylon thread remains the standard choice; color preserver determines whether the wrap darkens under finish. Size A thread gives a refined look on most fly rods, though some saltwater or heavy freshwater rods use larger thread for abrasion resistance or bolder trim. Start wraps with enough lead length to lock securely, keep turns parallel, and burnish lightly to remove gaps before finish. Metallic trim can look sharp, but overused trim often makes a rod look busy rather than custom.
Guide feet should be prepped before wrapping. File or stone the leading edge into a smooth ramp so thread climbs without bunching. Polish away burrs that could cut thread or line. This is a small step with outsized effect, especially on fine trout wraps. When securing snake guides, keep foot lengths consistent left to right so wraps look balanced. If a guide wants to twist during wrapping, use small alignment bands or temporary tape tabs. Visual symmetry is not cosmetic vanity alone; it reflects underlying control and care throughout the build.
Finish application rewards patience and punishes dust, bubbles, and excess epoxy. Use a measured two-part rod finish, mix slowly for a full recommended interval, and allow bubbles to release before application. A powered dryer helps level finish, but overloading the wraps is still a mistake. Thin, even coats outperform thick football-shaped buildups. On most fly rods, two controlled coats produce a cleaner result than one heavy coat. Use a spatula or fine brush, wick away excess from the underside, and inspect under strong light while the rod turns. Temperature stability matters; cool rooms thicken finish and trap defects.
Performance tuning, testing, and common mistakes to avoid
The final stage in building your own fly rod is performance tuning. After the finish cures fully, assemble the rod with the intended reel and line, then cast it at practical fishing distances. Check tracking, loop shape, line pickup, and how the rod responds at twenty, forty, and sixty feet. If the rod feels tip-heavy, the issue may be component weight or reel pairing rather than blank design. If it struggles to load, the line may be too light for your stroke. Many modern rods fish better with a line a half size heavy, particularly for close-range work.
Pay special attention to ferrules. Most manufacturers specify leaving a visible gap at assembly to accommodate wear. Mark ferrule positions with tiny witness marks if needed so you can detect loosening during fishing. Ferrule wax is useful on some builds, but follow blank maker guidance because not every finish or ferrule design benefits from it. Inspect guide wraps after lawn casting and after the first few fishing trips. Tiny cracks in finish near guide feet often indicate flex concentration or insufficient tunnel sealing. Catching issues early prevents water intrusion and larger failures later.
The most common mistakes are predictable: rushing reaming, trusting stock guide spacing without testing, using too much finish, failing to prep guide feet, misaligning components during glue-up, and selecting a blank before defining the actual fishing job. Another recurring problem is overbuilding a light rod with heavy seats, oversized stripping guides, and decorative wraps that add unnecessary mass. Every added gram influences recovery and swing weight. The best custom rods are not the most ornate. They are the most coherent. Build decisions should support a specific fishing outcome, then disappear in use.
How this advanced-techniques hub should guide your next build
Building your own fly rod teaches you how materials, component choices, and construction methods translate directly into on-water performance. The key takeaways are straightforward: start with a clear fishing purpose, choose a blank by real specifications instead of marketing language, fit grips and seats with patience, refine guide spacing through static testing, and apply thread finish sparingly and cleanly. When these fundamentals are done well, the rod will cast better, wear longer, and feel unmistakably personal. That is the true advantage of a custom fly rod.
As a hub for advanced techniques, this subject connects naturally to line matching, casting mechanics, ferrule care, guide maintenance, fly line control, and species-specific rod design. The more rods you build, the more clearly you see those relationships. A nymphing rod emphasizes reach and line management. A streamer rod emphasizes lifting power and recovery speed. A small-stream glass rod emphasizes loading feel and short-range accuracy. Rod building turns those tradeoffs from abstract ideas into tangible, testable decisions, which is why it belongs at the center of serious tackle strategy.
If you are ready to begin, start with one clearly defined build and document every step, measurement, and component choice. Keep notes on blank specs, guide spacing, adhesive cure times, and casting impressions so your second rod is better than your first. Then use this advanced-techniques hub as the foundation for deeper study of line systems, casting applications, and rod maintenance. Build carefully, test honestly, and fish the results hard. That is how a custom fly rod becomes more than a project and starts becoming part of your technique.
Frequently Asked Questions
Is building your own fly rod really worth it compared to buying a factory rod?
Yes, for many anglers it absolutely is, but not because it is always cheaper. The real value of a custom fly rod build is control. When you build your own rod, you are choosing the blank material, length, line weight, action, grip shape, reel seat hardware, guide style, thread colors, and finish details to match how and where you actually fish. That means you can tune the rod for small-stream dry flies, long nymph rigs, heavy streamer work, saltwater flats, or stillwater presentations instead of settling for a general-purpose factory setup.
There is also a major performance advantage in understanding how the rod is put together. Once you have selected the components yourself and worked through guide spacing, handle placement, and alignment, you begin to understand why some rods recover faster, track more cleanly, or feel better under load. That knowledge makes you a better angler because you stop thinking of a rod as a generic tool and start recognizing how line system, casting stroke, fish size, and conditions interact.
On top of that, rod building is deeply satisfying in a way that buying gear off a rack is not. A finished custom rod carries your decisions and your workmanship. If the build is done carefully, the result can rival or exceed the feel and function of many factory rods. So if your goal is convenience, buying a quality production rod may make more sense. But if your goal is performance tailored to your fishing and the satisfaction of building a rod that is truly yours, it is very much worth it.
What components matter most when planning a custom fly rod build?
The blank is the most important starting point because it determines the rod’s core personality. Material, taper, length, line weight, and action all affect how the rod loads, recovers, tracks, and protects tippet. A fast-action graphite blank may be ideal for distance, wind, and line speed, while a moderate-action blank often shines in short-to-medium range fishing where feel and presentation matter most. Fiberglass and bamboo bring very different casting characteristics as well, so the right blank depends on your target species, preferred line system, and casting style.
After the blank, the grip and reel seat deserve serious thought. The handle is your direct point of contact with the rod, so comfort matters more than many first-time builders expect. A full wells grip may be better for larger rods and stronger casting strokes, while a half wells or cigar grip may feel more natural on lighter trout rods. Reel seat selection is not just cosmetic either. Weight, balance, uplocking versus downlocking configuration, and durability all affect how the rod feels in hand and performs over a full day on the water.
Guides, tip-top, winding checks, hook keepers, thread, and finish all play supporting roles, but they still matter. Guide size and placement influence line flow, tracking, and stress distribution. High-quality snake guides or single-foot guides can each be appropriate depending on the build philosophy. Thread wraps and finish are not merely decorative; they protect guide feet, add durability, and contribute to the overall balance between clean aesthetics and functional strength. The best builds come from treating every component as part of a system rather than choosing parts independently.
How do I choose the right blank and action for the kind of fly fishing I do?
Start by being honest about how you fish most often, not how you imagine fishing on your best day. If you mostly cast at 20 to 40 feet on small or medium rivers, a highly specialized fast-action distance rod may not serve you as well as a moderate or medium-fast blank that loads more easily at practical fishing ranges. On the other hand, if you routinely deal with wind, larger flies, sinking lines, or long casts, a faster blank with stronger butt power may be the right choice. The ideal rod is the one that complements your actual fishing conditions and your natural casting tempo.
Line weight should be chosen based on fly size, fish size, and the demands of the water. A 3-weight or 4-weight may be perfect for technical dry-fly trout fishing in small streams, while a 5-weight or 6-weight is often more versatile for general trout fishing, nymphing, and light streamer work. Heavier rods become necessary for bass bugs, pike flies, salmon, steelhead, or saltwater species. Length matters too. Shorter rods can feel more nimble in tight cover, while longer rods improve line control, mending, and reach, especially in nymphing or larger river situations.
It also helps to think about how a blank matches your casting stroke. Some anglers naturally prefer a slower, smoother load and benefit from a rod that bends more progressively. Others have a compact, aggressive stroke and perform better with quicker recovery and stronger tip stability. If possible, cast rods built on similar blanks before committing. If that is not possible, study manufacturer descriptions carefully, read feedback from experienced builders, and choose based on fishing application first and marketing language second. The blank is the foundation of the whole project, so this is the place where careful planning pays off the most.
What are the most common mistakes beginners make when building a fly rod?
The most common mistake is rushing. First-time builders often underestimate how much precision matters in alignment, guide preparation, wrapping tension, and epoxy application. A custom rod does not require a factory production line, but it does require patience. Crooked guides, uneven wraps, bubbles in finish, excess epoxy, or poorly fitted grips usually come from trying to move too quickly rather than from a lack of talent. Slowing down and treating each step as its own small craft process makes a dramatic difference in the final result.
Another frequent problem is poor component planning. Builders sometimes buy parts based on appearance alone without considering fit, balance, or intended use. A reel seat that looks beautiful but does not match the blank diameter properly can create assembly headaches. A grip that feels fine in the hand for a minute may become uncomfortable after hours of casting. Guide spacing copied blindly from another rod may not suit the blank’s taper and flex pattern. Good rod building starts long before glue is mixed, with careful measuring, dry fitting, and test layout.
Finish work is another area where beginners struggle. Too much epoxy creates bulky wraps and unnecessary weight; too little leaves thread exposed and vulnerable. Uneven rotation during curing can cause sagging or football-shaped buildup. Insufficient guide foot prep makes wrapping harder than it needs to be and leads to messy transitions. The good news is that most of these mistakes are avoidable with simple discipline: prep guide feet carefully, test fit every part, keep wraps clean, use finish sparingly, and practice on scrap materials if necessary. A first build does not have to be perfect, but it should be deliberate.
What tools and techniques help produce a professional-looking custom fly rod?
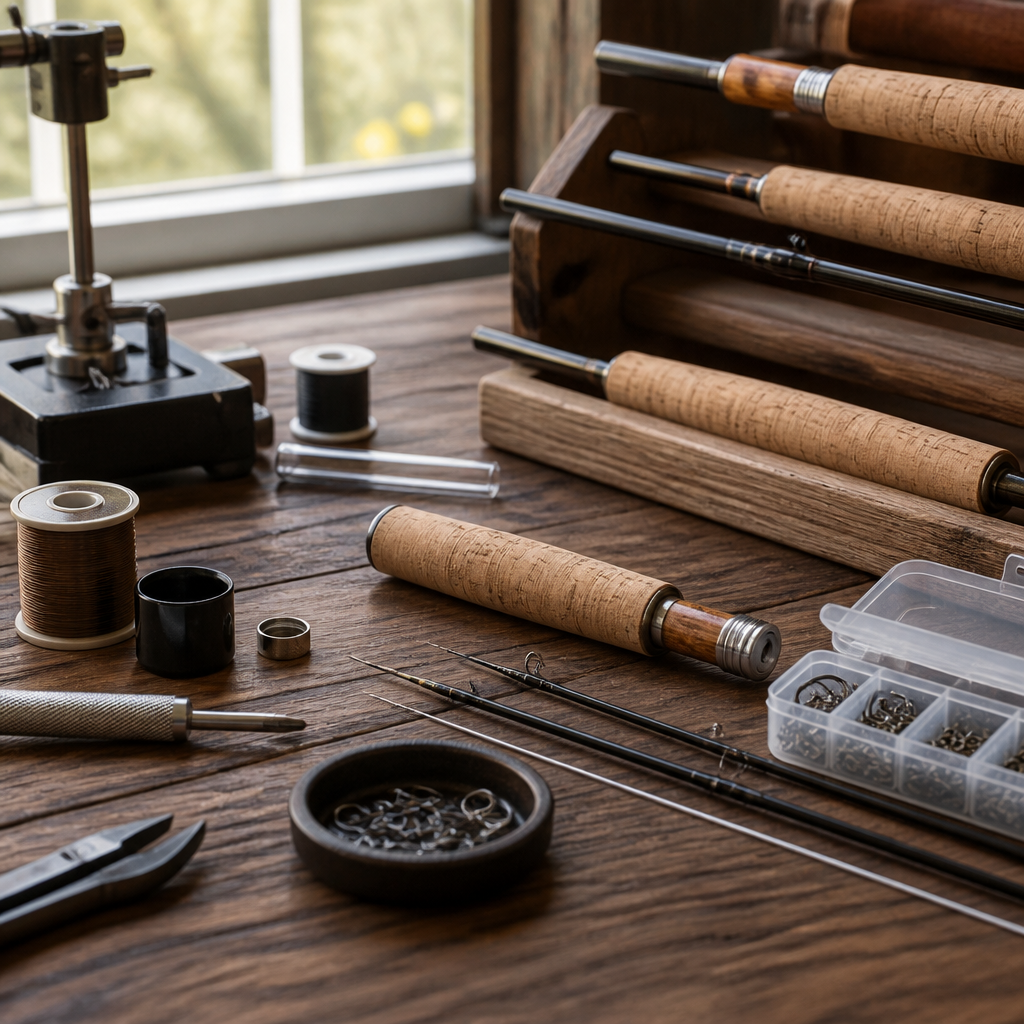
You do not need an elaborate workshop to build an excellent fly rod, but a few dedicated tools make the process much easier. A reliable wrapping stand, a drying motor for finish, burnishing tools, fine files for guide foot preparation, reamers for grip fitting, masking tape, mixing cups, brushes or spatulas for epoxy, and accurate measuring tools are all worth having. Good lighting is also essential because many rod-building flaws are easier to prevent than to fix, and you need to be able to see thread tension, alignment, and finish coverage clearly.
Technique matters just as much as equipment. Begin with careful blank inspection and spine or straight-axis consideration, depending on your build approach. Dry fit the handle and reel seat before gluing anything. Ream cork slowly so it fits snugly without wobble. Prep guide feet so thread climbs smoothly and wraps lie flat. Maintain consistent thread tension and pack wraps regularly to avoid gaps. Before finishing, verify that every guide is aligned from multiple angles. Small corrections made before epoxy save a lot of frustration later.
For the final finish, less is usually more. Mix epoxy thoroughly but gently to reduce bubbles, apply thin even coats, and rotate the rod consistently while curing. If a second light coat is needed for full coverage and protection, that is often better than one heavy coat. A professional-looking rod is not just about glossy wraps. It is about clean transitions, balanced component choices, straight guide alignment, neat thread work, and an overall sense that every detail belongs. That kind of result comes from methodical work, not expensive tools alone, and it is well within reach for a careful first-time builder.