Fly fishing enthusiasts and experts alike often understand the significance of a well-tied fly. However, there are instances when fish prefer flies that appear injured or imperfect—these are termed “crippled flies.” Crippled flies can imitate an insect struggling to emerge or one that has been damaged, making it an irresistible meal for fish. In this comprehensive guide, we will delve deep into the art and science of tying crippled flies. With the right technique, you’ll be well on your way to creating enticing patterns that will drive fish wild.
Introduction
Fly fishing is more than just a sport; it’s an immersive experience that combines patience, skill, and an understanding of nature. One of the lesser-discussed but highly effective techniques in fly fishing is the use of crippled flies. These flies mimic the appearance of insects that are either damaged or in the process of hatching but have failed to completely emerge from their casing. The irregularities and vulnerabilities presented by these patterns make them highly attractive to predatory fish.
Understanding how and why crippled flies are effective can significantly enhance your fly fishing success rate. Fish often select crippled flies because they seem like easy prey. The limp, struggling movements mimic real-life scenarios where insects are caught in the surface tension of the water, trying to break free but without success. This perceived vulnerability is what makes these patterns so compelling.
There are numerous styles and types of crippled flies, each designed for specific conditions and types of fish. They can be tied in myriad ways, using various materials and techniques to achieve the desired effect. In this guide, we will break down the essential techniques for tying these flies, the materials you’ll need, and offer some tips to perfect your craft. By the end, you’ll have an arsenal of skills to create flies that will up your fishing game.
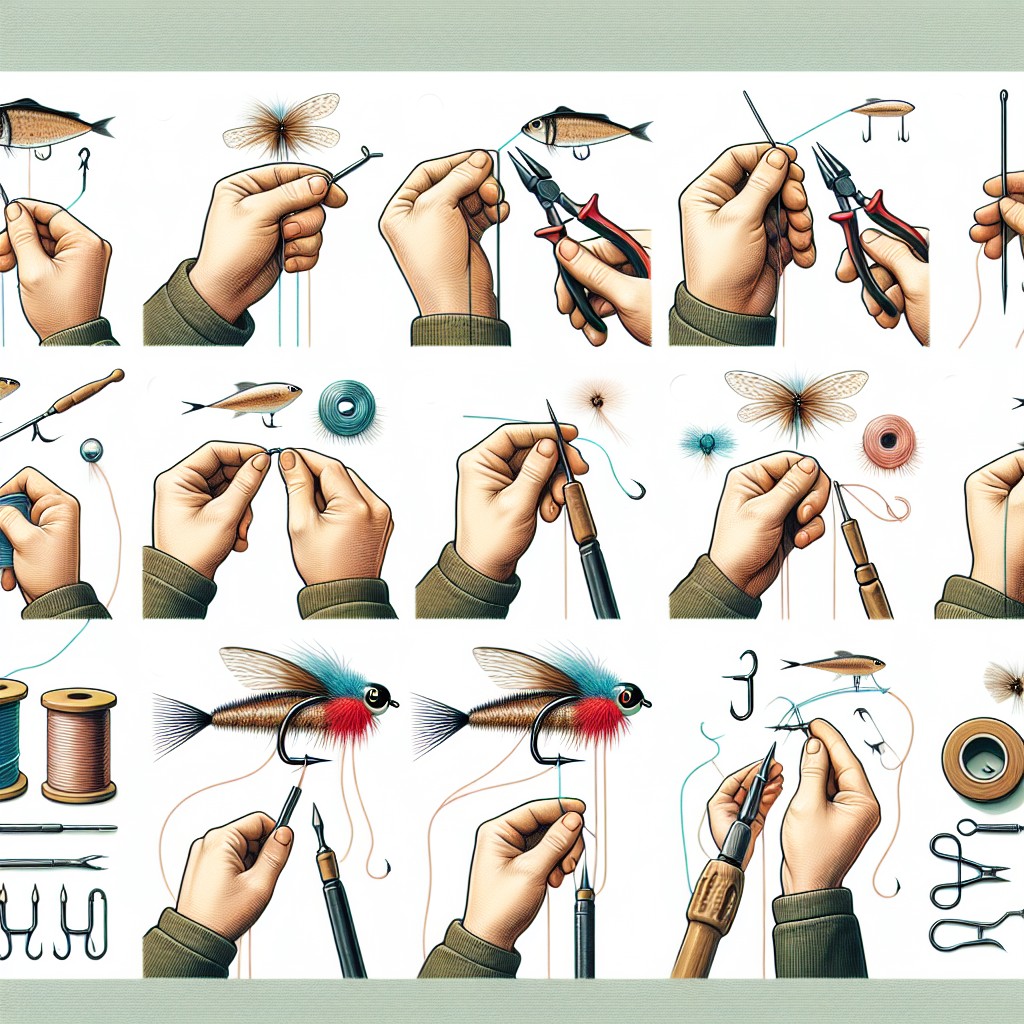
Materials Needed
Before diving into the specifics of tying crippled flies, it’s crucial to have the right materials. Below is a list of the basic supplies you’ll need:
- Hooks: Use high-quality, barbless hooks. Size can vary but commonly ranges from #12 to #18.
- Thread: A fine, strong thread in colors such as black, brown, or olive.
- Wing Material: Deer hair, synthetic fibers, or CDC feathers work well.
- Body Materials: Dubbing in colors like tan, grey, or olive.
- Tails: Coq de Leon, Hackle fibers, or other stiff materials.
- Tools: Scissors, bobbin holder, hackle pliers, and whip finisher.
Each of these materials plays a specific role in imitating the appearance and movement of a crippled insect. Choosing the right combination will depend on the type of fly you’re aiming to create and the fish you are targeting.
Tying Techniques for Crippled Flies
Once you have your materials ready, the next step is to master some basic tying techniques. Here’s a step-by-step approach to get you started:
- Secure the Hook: Start by securing your hook in the vise. Make sure it is tightly gripped to avoid any movement.
- Start the Thread: Attach your thread to the hook shank near the eye. Wrap it slowly towards the bend of the hook.
- Tie the Tail: Select the tail material and attach it at the curve of the hook. Ensure the length is about the same as the shank.
- Create the Body: Use your chosen dubbing material to build up the body. This can be done by applying small amounts of dubbing to the thread and wrapping it forward.
- Attach the Wing: Tie in your wing materials near the midpoint of the shank. The wing should extend slightly beyond the hook bend to mimic a struggling insect.
- Form the Thorax: Add some more dubbing or hackle near the head to create the thorax. This helps in providing a more realistic look.
- Finishing Touches: Whip finish the fly and trim any excess materials. Varnish the head to secure the thread wraps.
Practicing these steps will help you get comfortable with the process. It’s important to experiment with different materials and techniques to find what works best for you.
Popular Crippled Fly Patterns
While there are limitless possibilities when it comes to creating crippled flies, some patterns have stood the test of time due to their effectiveness. Here are a few popular ones:
1. The Crippled Caddis
The Crippled Caddis is designed to look like a caddis fly that is in the process of emerging but hasn’t quite made it. Use deer hair for the wing and brown dubbing for the body. This pattern is especially useful in fast-flowing waters.
2. The Klinkhåmer Special
This pattern is excellent for imitating midges and small mayflies. Use a curved hook and tie the body with peacock herl. The wing post can be made from white or colored synthetic fibers.
3. The Crippled Emerger
Designed to mimic mayfly emergers stuck in their shuck, this fly uses CDC for the wing and brown or olive dubbing for the body. It’s extremely effective during mayfly hatches.
These are just a few examples, but the principles you learn from tying these can be applied to create countless other patterns.
Adjusting for Different Conditions
Fly fishing is highly dependent on environmental conditions, and so should be your fly patterns. Adjusting your crippled flies to suit different conditions can make a significant difference:
- Water Clarity: In clearer waters, opt for more subtle colors and finer details. For murky water, brighter and bulkier patterns can be more effective.
- Current Speed: Fast-moving waters may call for flies with more buoyant materials like CDC or foam, while calmer waters can work well with more finely-tied, delicate patterns.
- Weather Conditions: On cloudy days, darker flies can stand out better against the less lit backdrop. Conversely, on sunny days, lighter and more iridescent materials can be more effective.
Always keep these varying conditions in mind when tying your flies, and don’t hesitate to make adjustments as needed.
Tips and Tricks from the Experts
Learning from seasoned fly tiers can drastically shorten the learning curve. Here are some tips and tricks that experts swear by:
“Match the hatch, but don’t be afraid to stand out. Sometimes the fish will go for something a bit unconventional.” – John Doe, Professional Fly Fisher
“Quality over quantity. Take your time to make each fly as realistic as possible. Sloppy work will result in fewer catches.” – Jane Smith, Fly Tying Instructor
“Experiment with materials. Sometimes the best flies come from trying unconventional things like synthetic fibers.” – Tom Johnson, Fly Tying Expert
Taking these tips to heart can help you refine your techniques and develop your unique style.
Conclusion
Tying crippled flies is a rewarding skill that can greatly enhance your fly fishing experience. Although the process may seem intricate, with patience and practice, you can master the art of creating flies that fish find irresistible. Understanding the theory behind why these patterns work, combined with mastering the techniques and materials, will set you up for success.
Start with basic patterns and gradually move to more complex ones as you gain confidence. Don’t be afraid to experiment and adjust your flies based on conditions and personal observations. By continually evolving your skills and knowledge, you’ll not only become a more competent fly tier but also a more successful angler.
Remember, the essence of fly fishing lies not just in the catch, but in the process and the tranquility it brings. So next time you head out to the waters, equipped with your newly tied crippled flies, savor each moment and appreciate the beauty of this timeless sport.


