Photography tips for catch and release matter because a great image should never come at the fish’s expense. In catch and release fishing, the goal is simple: land the fish, document the moment, and return it in strong condition. That sounds straightforward, but cameras, excitement, and poor preparation often extend air exposure, increase handling stress, and damage protective slime, fins, or jaws. I have seen anglers spend more time fumbling with phones than controlling a healthy release, and the difference between a careful thirty-second process and a chaotic two-minute photo session is enormous.
This hub article explains how to photograph catch and release fish responsibly, with practical guidance that works for trout streams, bass lakes, saltwater flats, and boat decks. It covers preparation before the hook-up, fish handling principles, camera setup, landing net choices, ideal poses, low-light and solo strategies, species-specific considerations, and common mistakes that cost fish their recovery. It also connects the wider catch and release topic: fish welfare, angling ethics, gear selection, environmental conditions, and the role of social media in shaping behavior on the water.
Responsible fish photography sits at the intersection of conservation and communication. Photos help anglers remember a day, verify a notable catch, promote guiding businesses, support citizen science, and inspire new participants. Yet a photo is only ethical if the fish remains the priority. Fisheries agencies, including state departments and organizations such as Trout Unlimited and Keep Fish Wet, consistently emphasize minimizing air exposure, reducing handling, and avoiding unnecessary contact with dry surfaces. Those principles are not anti-photo; they are the foundation of better photos and better releases.
Key terms are worth defining. Air exposure means any time a fish’s gills are not submerged. Fish handling refers to every touchpoint, including netting, gripping, lifting, and unhooking. Recovery is the period when a fish regains equilibrium and ventilation before swimming off strongly. A hero shot is the classic fish-in-hands image; a water-level release shot captures the fish at the surface or just below it. A grip-and-grin can be ethical, but only when it is planned, brief, and done with wet hands, proper support, and a ready camera.
Prepare Before the Fish Is Hooked
The best catch and release photography begins before you make a cast. Most harmful photo sessions fail because nothing is ready: the phone is buried in a pack, the lens is wet, the net is clipped awkwardly, and nobody has decided who will shoot. I always treat the camera workflow like knot tying or drag setting: part of the system, not an afterthought. If you know you may want a photo, preset the camera, clear storage space, wipe the lens, and discuss the sequence with your partner. On solo trips, position the tripod or clamp before fishing the run.
Gear choices directly affect photo quality and fish survival. A rubber or silicone landing net is far better than old knotted nylon because it reduces fin abrasion, scale loss, and slime removal. Barbless hooks or pinched barbs shorten unhooking time. Long-nose pliers, hemostats, or a quality dehooker should be accessible with one hand. Waterproof phone cases are useful, but many slow anglers down if the touchscreen becomes unresponsive when wet. Dedicated action cameras on chest mounts can document the catch without a prolonged pose, though they still require restraint if you decide to lift the fish.
Light preparation matters too. Early and late in the day provide softer light, which is flattering for photos and often cooler for fish. In summer, however, warmer water can make even short photo sessions risky, especially for coldwater species like trout. In those conditions, the ethical answer may be no hero shot at all. A quick in-water image is enough. This is a core rule across catch and release: if environmental stress is already high, reduce every added stressor you control.
How to Handle Fish Safely for Photos
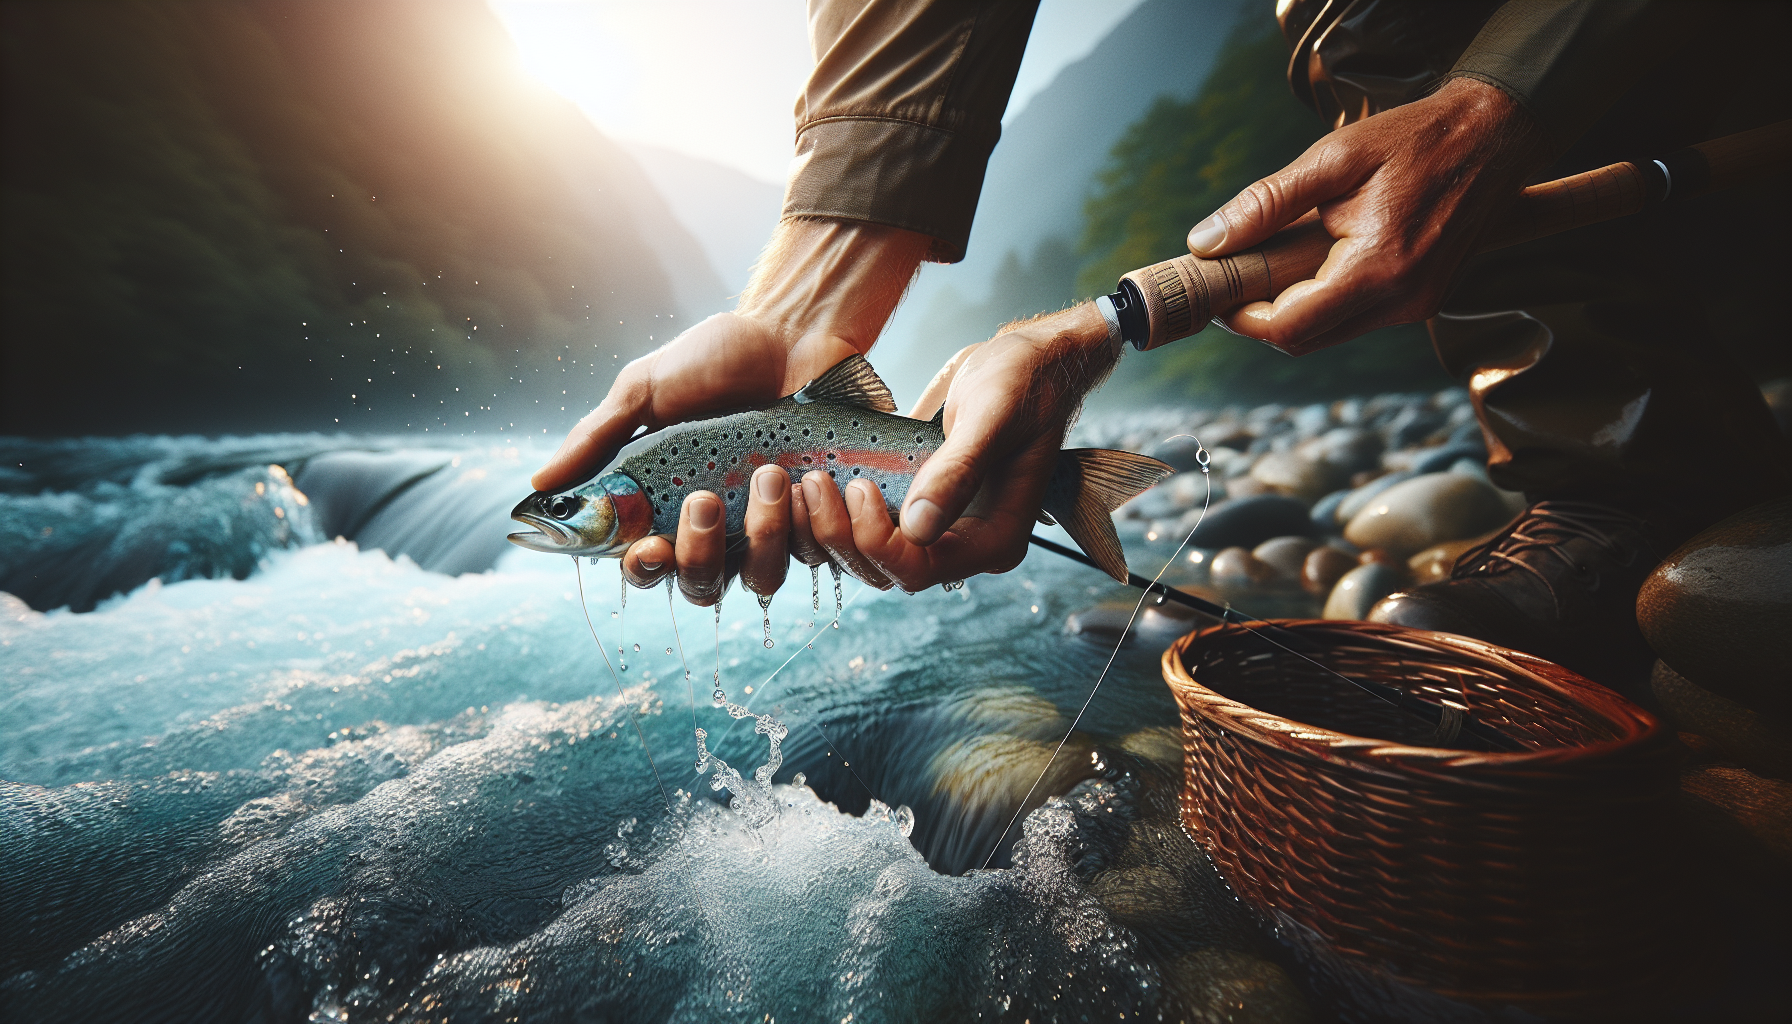
If you remember only one principle, remember this: control the fish in the water first, then decide whether a lift is justified. Keep the fish submerged in a rubber net while you remove the hook and prepare the shot. Wet your hands before touching it. Never squeeze the body, put fingers in the gills, or drag the fish onto rocks, carpet, sand, or a hot boat deck. Support the fish horizontally with two hands whenever possible, one near the pectoral area and one at the wrist of the tail. Vertical holds can strain jaws and internal organs, particularly with larger bass, pike, salmonids, and saltwater species.
Air exposure should be measured in seconds, not minutes. Research cited by conservation groups repeatedly shows that cumulative air exposure after exercise reduces survival, and the effect compounds in warm water. A practical field standard many guides use is “one breath above water.” Lift, shoot two or three frames, and return the fish immediately. If you need another attempt, let the fish recover in the net before a second brief lift. This approach consistently produces better results than holding the fish aloft while the photographer adjusts settings.
Unhooking technique is part of photography ethics because a deeply hooked fish, or one tangled in treble hooks, can derail your timing. Single hooks are generally easier to remove and safer around hands, fins, and nets. With fish that are bleeding, exhausted, or difficult to revive, skip the extended photo process entirely. Documentation can be done in the water. Ethical angling is not about forcing the same ritual on every catch; it is about making the right decision for the fish in front of you.
Best Photo Setups for Fast, Clean Results
A good catch and release photo is built on speed, stability, and simple composition. Phones are excellent because they focus quickly and are always close, but they need preparation. Use burst mode or live photo functions so the photographer can tap once and choose the best frame later. Set exposure slightly down in bright conditions to protect highlights on reflective scales. On mirrorless or DSLR cameras, a shutter speed around 1/500 or faster helps freeze fin movement and water drops. Continuous autofocus is useful if the fish is partly in the water and moving.
Framing should be decided before the fish leaves the net. The most reliable composition is chest-high, fish close to the angler, horizon level, and background uncluttered. Avoid extending the fish toward the lens to exaggerate size. That perspective is obvious, distorts proportions, and undercuts trust. Better photos show true scale, healthy support, and context: current seams, marsh grass, drift boat gunwales, or tidal flats. For conservation messaging, in-water angles are especially strong because they show the release environment and naturally limit harmful handling.
| Scenario | Best Photo Choice | Why It Works |
|---|---|---|
| Cold trout stream, cool water | Net shot plus one brief horizontal lift | Balances documentation with low handling time |
| Warm summer river, trout stressed | In-water release shot only | Reduces air exposure during risky conditions |
| Boat fishing for bass | Kneeling hero shot over wet deck mat | Limits drop distance and supports the fish safely |
| Solo wading | Tripod or chest camera, fish half-submerged | Avoids long delays while operating the camera alone |
| Large pike or saltwater fish | Water-level side profile with full body support | Prevents jaw strain and shows accurate size |
When photographing children or inexperienced anglers, simplify even more. Keep the fish in the net, have the child kneel close to the water, and let the photographer do all camera work. I have found that a calm, preplanned script works: “Hands wet, support here, look up, one second, back in.” The photo is safer and usually more natural than repeated instructions while the fish struggles.
Species and Conditions Change the Right Approach
Not all fish tolerate handling equally. Trout and salmon are especially sensitive to warm water and prolonged air exposure because their oxygen demands remain high after a fight. That is why many trout anglers avoid photography when water temperatures approach the upper sixties Fahrenheit, and some rivers impose temperature-based closures. Bass are generally hardy, but large fish still need horizontal support, especially during spawning season when stress can affect nesting success. Pike, muskie, and many saltwater fish present additional hazards: teeth, thrashing, and heavy bodies that make unsupported holds dangerous.
Surf, jetty, and flats anglers face another challenge: abrasive or hot surfaces. A fish laid briefly on dry sand may lose protective slime and pick up grit that damages gills. On boats, metal decks and synthetic carpets can heat rapidly in the sun. If a fish must come aboard for safety or dehooking, a wet landing mat is much better than bare deck material. Better still, keep the fish alongside the boat in a net or cradle while the camera is readied.
Weather also affects your strategy. Bright overhead sun creates harsh shadows and blown highlights, often tempting anglers to prolong the process while chasing a cleaner frame. Do the opposite. Take the quick photo and move on. Rain, spray, and fogging lenses create similar delays, so carry a microfiber cloth somewhere instantly reachable. Wind can complicate self-timer shots and increase the chance of dropping a fish. In those moments, the conservative option is usually the right one.
Solo Angler Photography Without Compromising the Release
Solo catch and release photos are where planning matters most. Without a partner, every second spent touching a screen or adjusting a tripod can become air exposure. The safest solo method is an in-water shot using a fixed camera position. Set the camera or phone on a small tripod, bank stick, magnetic mount, or clamp before fishing. Use a wide frame, a remote shutter, voice control, or a short timer. Then land the fish, leave it submerged in the net while you move into position, and lift only when the camera is already counting down or recording.
Video can outperform still photography for solo anglers. Record a short clip in 4K, keep the fish half-submerged, and later pull a high-resolution frame. This removes the pressure to nail a single shutter press while holding the fish. Action cameras mounted on the chest, shoulder, or net handle are particularly effective for release footage because they are always rolling or can be activated quickly. The limitation is image quality in low light and the need to check framing beforehand. Still, from a fish-care standpoint, video often wins.
Net management is critical when alone. A long-handled rubber net lets you control the fish beside you without beaching it. In current, turn the net opening downstream so water flows through it and the fish remains upright. If the fish is still green and kicking hard, do not rush into a photo attempt. Wait until it is controlled, because drops happen when anglers try to force the moment before the fish is ready.
Common Mistakes and the Ethics of Sharing Images
The biggest mistakes in catch and release photography are predictable: dry hands, fish on the ground, fingers in the gills, vertical lip holds for heavy fish, repeated lifts for multiple cameras, and long revival videos made after an unnecessarily long photo session. Another common problem is celebrating “quick photos” that were only quick after several failed attempts. If the first lift does not work, go back to the net and reassess rather than persisting through exhaustion and chaos.
Social media adds a layer of responsibility. Images teach other anglers what normal behavior looks like. When people repeatedly post trout on dry rocks or oversized bass hanging from one jaw, those practices spread. The opposite is also true: well-composed in-water release photos, visible rubber nets, wet hands, and honest captions help set a better standard. If you run a guide service, brand, club, or conservation group, your photos are instructional whether you intend them to be or not.
This is why catch and release should be treated as a system, not a slogan. Ethical photography depends on tackle that lands fish efficiently, fish-friendly nets, proper water-temperature judgment, skilled hook removal, and restraint about when to skip the shot. The hub topics beneath this subject all connect here: how to revive fish correctly, when not to fish due to heat, barbless versus barbed hooks, fish handling by species, landing net selection, and the ethics of posting location details for vulnerable fisheries.
The central lesson is simple: the best catch and release photography is prepared, brief, and fish-centered. Get the camera ready before the cast, use a rubber net, keep the fish wet, support it horizontally, and limit air exposure to a few seconds. Adjust your approach for trout, bass, pike, and saltwater species, and be especially cautious in warm water or when fishing alone. A strong image should document responsible angling, not excuse poor handling.
When you treat photos as part of conservation rather than separate from it, you get better outcomes on every level. Fish recover faster, your images look more authentic, and the example you set helps protect the waters you enjoy. Use this hub as your starting point for every catch and release question, then apply one rule on your next trip: if a photo conflicts with the fish’s recovery, choose the recovery. That decision is what responsible angling looks like.
Frequently Asked Questions
What is the best way to photograph a catch and release fish without harming it?
The best approach is to prepare everything before the fish is ever lifted for a photo. That means your camera or phone should already be on, unlocked, and set to the mode you plan to use. If you are fishing with a partner, talk through the shot ahead of time so one person handles the fish and the other handles the camera. If you are alone, preset a timer, use a tripod or stable mount, and know exactly where you will kneel before you lift the fish. The goal is to reduce air exposure to just a few seconds rather than turning the landing into a long photo session.
Keep the fish in the water or partially submerged while you get organized. If conditions allow, many of the best catch and release images are taken with the fish still in the net, at the water’s surface, or cradled just above the waterline. Wet your hands before touching the fish, support its body properly, and avoid squeezing around the midsection or hanging it vertically by the jaw. A fast, controlled lift for one or two frames is far better than repeated poses. In practical terms, the safest routine is land the fish, keep it calm, set the camera, lift briefly, take the shot, and return it immediately for recovery.
How long can a fish safely be out of the water for a quick photo?
As a rule, the less time out of the water, the better. Many experienced catch and release anglers follow the idea that if you are counting seconds, not minutes, you are on the right track. There is no universal safe number that applies to every species, water temperature, and fight duration, because fish stress levels vary widely. A fish caught in cold water and landed quickly may recover better than one fought hard in warm water, but even then, minimizing air exposure is one of the most important things you can control.
A useful standard is to keep the fish in the water while preparing, then lift it only when the camera operator is completely ready. Take one or two quick frames and return the fish immediately. If you need another shot, let the fish recover in the water first rather than holding it up continuously. Warm water, prolonged fights, and sensitive species all make quick handling even more important. For catch and release photography, think of the photo as a short interruption to the release process, not the main event. That mindset leads to healthier fish and usually better, more natural-looking images too.
Should you hold a fish horizontally or vertically in catch and release photos?
In most cases, a horizontal hold is the safest and most responsible choice. Supporting a fish horizontally helps distribute its weight more naturally and reduces strain on the jaw, spine, and internal organs. This is especially important with larger fish, because hanging them vertically can create unnecessary stress and increase the risk of injury. If you need to control the head, you can lightly grip near the mouth area, but the body should still be supported with the other hand under the belly or near the tail wrist depending on the species.
Vertical holds are often overused because they seem simple and make the fish look long, but they are usually not ideal for fish that will be released. Lip-gripping a heavy fish with no body support can damage the jaw and affect feeding after release. The safer habit is to kneel close to the water, keep a firm but gentle hold, and present the fish level to the camera for a brief moment. This also lowers the risk of dropping the fish onto rocks, a boat deck, or the bank. A well-supported fish not only has a better chance of swimming away strong, it also looks more natural and more respectful in the final photograph.
What camera setup works best for quick, fish-friendly catch and release photos?
The best setup is the one that lets you get the image fast with the least handling. For most anglers, that means a phone with the camera app already open, a simple burst mode, or a quick-access button that launches the camera instantly. If you fish with a partner, assign one person to photography so there is no confusion once the fish is landed. If you fish alone, a phone clamp, small tripod, action camera, or remote shutter can make a huge difference. These tools remove the delay of trying to balance a slippery fish while fumbling for framing.
Keep your settings simple and reliable. In bright conditions, natural light is usually enough, and burst mode can capture a sharp frame in a very short window. Avoid complicated adjustments that force the fish to wait while you experiment. If you want better results, frame wider than you think you need so you can crop later instead of wasting time trying to achieve perfect composition in the moment. Waterproof cases, lens wipes, and a secure mounting point also help you stay efficient. In catch and release photography, convenience is not laziness; it is part of ethical preparation. The easier your system is to use, the faster the fish gets back into the water.
How can you get a great catch and release photo while still prioritizing a healthy release?
The key is to redefine what makes a great fishing photo. A great catch and release image is not just about size, pose, or grip-and-grin tradition. It is about showing the fish in strong condition, handled responsibly, and released with care. Photos taken at water level, with wet hands, controlled support, and the fish close to the water often look more authentic and dramatic than rushed hero shots taken high above the ground. Good composition still matters, but fish welfare has to come first.
Focus on storytelling details that do not require prolonged handling. Photograph the fish in the net, the angler kneeling at the shoreline, the release moment, water droplets, natural light, and the environment around the catch. These images often communicate more than a standard hold-up shot and can be taken with far less stress on the fish. If you do want a classic portrait, plan for one clean lift, one short burst of frames, and a return to the water. Revive the fish if needed by holding it upright in current or calm water until it kicks away on its own. The most memorable catch and release photos are the ones you can look back on knowing the fish swam away strong.