Fly tying is an art and a skill that, when mastered, brings immense satisfaction to any angler. One of the most exciting fly patterns to create and fish with is the popper fly. Known for their distinctive “pop” when they hit the water, popper flies attract fish with surface disturbance, imitating small fish or insects that larger fish love to feast on. This step-by-step guide provides all the information necessary to create your own popper flies. From materials to techniques, we’ll walk you through the process and offer tips to ensure you create effective popper flies that will enhance your fly fishing experience.
Introduction to Popper Flies
Popper flies are surface flies designed to create a noticeable disturbance on the water’s surface, mimicking prey such as small fish or bugs that attract predatory fish. They are particularly effective for species such as bass, panfish, and other aggressive feeders. The key feature of a popper fly is its “pop,” produced by the distinctive head design, which can range from simple flat-faced cylinders to intricate carved designs.
Creating popper flies involves a mix of creativity, skill, and patience. The materials can vary widely, from foam and balsa wood for the body to various feathers and synthetic fibers for the tail and skirt. Each material and design choice impacts how the popper performs and appears in the water. As you gain experience, you’ll be able to experiment with different combinations to see what works best for you and your local fishing conditions.
In this guide, we’ll start with the basics, introducing you to the necessary materials and tools before moving on to more advanced techniques. Whether you’re a seasoned fly tier looking to expand your repertoire or a beginner eager to dive into the world of poppers, this guide has something for you.
Materials and Tools for Popper Flies
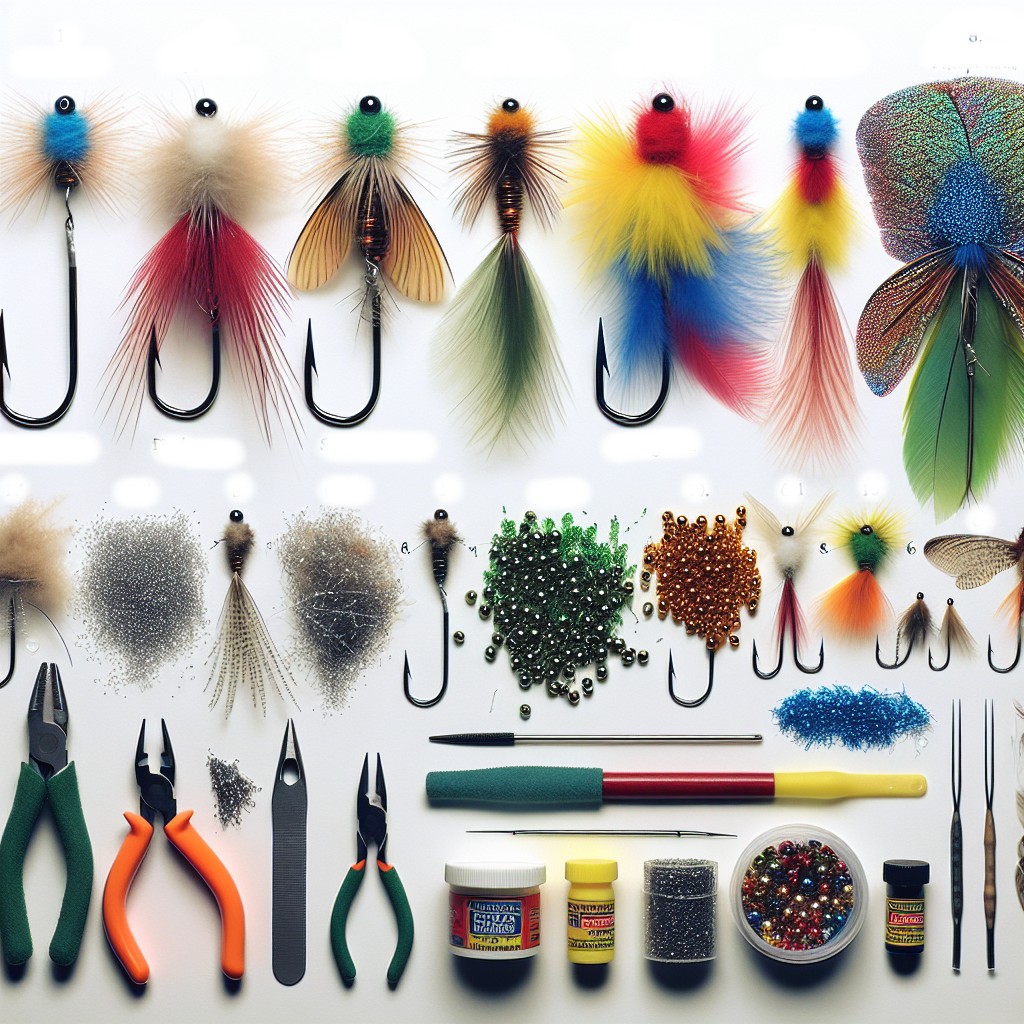
Before you start tying popper flies, it’s essential to gather the right materials and tools. Here’s a detailed list to get you started:
- Hooks: Use straight-shank popper hooks, typically sizes 2 to 8, depending on the target fish species.
- Body Material: Common materials include foam cylinders, balsa wood, and cork. Foam is the most widely used due to its buoyancy and ease of shaping.
- Thread: A strong, thick thread suitable for securing larger materials. 3/0 or 6/0 in a variety of colors can work well.
- Adhesive: Super glue or contact cement for attaching the body to the hook.
- Eyes: Use stick-on or painted eyes for added realism. 3D adhesive eyes are also popular.
- Tail Material: Use natural materials like feathers or synthetic fibers to create attractive, lifelike tails. Marabou and saddle hackle feathers are popular choices.
- Skirt Material: Silicone or rubber legs can be added for extra movement.
- Paint and Markers: To add color and patterns to the body, use durable waterproof paint and markers.
- Vise: A sturdy fly tying vise to hold the hook securely.
- Tying Tools: Scissors, bodkin, bobbin holder, and a whip finisher.
Once you have these materials and tools, you’re ready to start tying your first popper fly.

Step-by-Step Tying Instructions
Step 1: Preparing the Hook
Start by securely placing your chosen hook in the vise. Make sure the hook is tightly clamped and won’t move as you work. Wrap a base layer of thread starting from behind the hook eye and work your way down towards the bend of the hook. This will provide a grip surface for the body material and ensure it stays in place.
Step 2: Attaching the Body
Depending on the body material you’ve chosen (foam, balsa, cork), you might need to do some preparation. For foam cylinders, you can simply cut them to the desired length. For balsa and cork, carving and sandpapering to the desired shape might be necessary.
Once the body is ready, apply a small amount of super glue to the hook shank where the body will be placed. Carefully slide the prepared body onto the hook, ensuring it’s centered and straight. Hold it in place for a few moments until the glue sets.
Step 3: Shaping and Detailing the Body
If you’re using foam, you might want to shave or sand the edges to smooth them out. For a more finished look, carve out a concave face to enhance the “pop” effect. Use waterproof paint or markers to add colors and patterns. Paint the top a darker color to mimic the view from above, and the bottom a lighter color to mimic the view from below. Adding stripes, dots, or eyes can make the popper more appealing to fish.
Step 4: Attaching the Tail
Start by selecting your tail materials. Marabou, saddle hackle, or synthetic fibers can be used to create a lively, attractive tail. Measure a length slightly longer than the hook shank and tie it in securely just behind the body. Make several firm wraps with your thread to ensure it stays in place. For added flair, consider mixing different colors or adding some sparkle with flash fibers.
Adding Skirt and Legs
The skirt and legs give the popper added movement, which can be irresistible to fish. Silicone or rubber legs are excellent options. Follow these steps to add them to your popper fly:
Step 5: Preparing the Skirt
Cut a few pieces of silicone or rubber legs to your desired length. They’re usually longer than the hook shank, as they need to move freely in the water. Group them together and tie them in just behind the body, covering the wraps you made for the tail. Secure them firmly with several thread wraps.
Step 6: Adding Legs to the Body
For added realism, you can add legs directly into the sides of the foam body. Use a bodkin to poke small holes through the body. Thread the silicone or rubber legs through these holes and use a small amount of super glue to secure them. Make sure they are evenly spaced and positioned for a natural look.
Step 7: Finishing the Legs
Once the legs are attached, position them so they spread out naturally when wet. Trim any excessively long pieces, ensuring they don’t over-extend past the hook’s bend. The legs should have enough length to move attractively in the water, but not so long that they inhibit the fly’s action.
Finishing Touches
Step 8: Adding the Eyes
Adding eyes can make your popper fly look more lifelike. You can use adhesive eyes or draw them on with a waterproof marker. If you’re using stick-on eyes, ensure the body is smooth and clean before applying. Place the eyes slightly above the hook shank for the best visual appeal. Press them firmly to make sure they’re secure.
Step 9: Final Thread Wraps
Secure all materials with a few extra wraps of thread near the hook eye. Use your whip finisher to tie off the thread and trim any excess. Apply a drop of head cement or clear nail polish to ensure the thread wraps won’t come loose.
Step 10: Inspect and Test
Your popper fly is almost ready! Give it a final inspection, checking for any loose materials or potential weak spots. Hold it under water to see how it looks and moves. Make any necessary adjustments to ensure it performs well in the water.
Congratulations, you’ve tied your first popper fly!
Advanced Techniques and Variations
Once you’re comfortable with the basic popper fly, there are numerous variations and advanced techniques you can try to refine your skills and broaden your fly selection:
Using Multi-Color Foam
Instead of using a single color foam, try layering multiple colors to create a more visually appealing body. You can cut strips of different colors and glue them together before shaping them around the hook.
Incorporating Flash
Fish are often attracted to shiny, reflective materials. Adding strands of flash material to the tail or skirt can increase the lure’s effectiveness. Tie in a few strands mixed with your tail materials for an eye-catching effect.
Adding Sound Elements
Experiment with adding small rattles or beads to create noise as the fly moves through the water. These tiny sound elements can be tied into the body or attached to the hook shank underneath the body material.
Custom Paint Designs
Take your creativity to the next level by custom painting your popper fly bodies. Use waterproof paint to create intricate designs, and add a clear coat for durability. You can even use stencils and airbrush techniques for professional finishes.
By experimenting with these advanced techniques, you’ll discover new ways to make your popper flies stand out and perform even better on the water.
Conclusion
Whether you’re a seasoned fly tier or a newcomer to the art, creating popper flies offers a blend of technical challenge and creative satisfaction. These surface lures provide an exciting fishing experience, attracting fish with their distinctive “pop” and enticing visuals. By following this step-by-step guide and experimenting with various techniques and materials, you’ll be able to build effective popper flies that enhance your fly fishing adventures.
Remember, practice is key to mastering fly tying. Every popper fly you create helps you refine your skills and develop your unique style. Enjoy the process, learn from each attempt, and soon you’ll have a collection of hand-tied popper flies that are tailored to your fishing needs.


