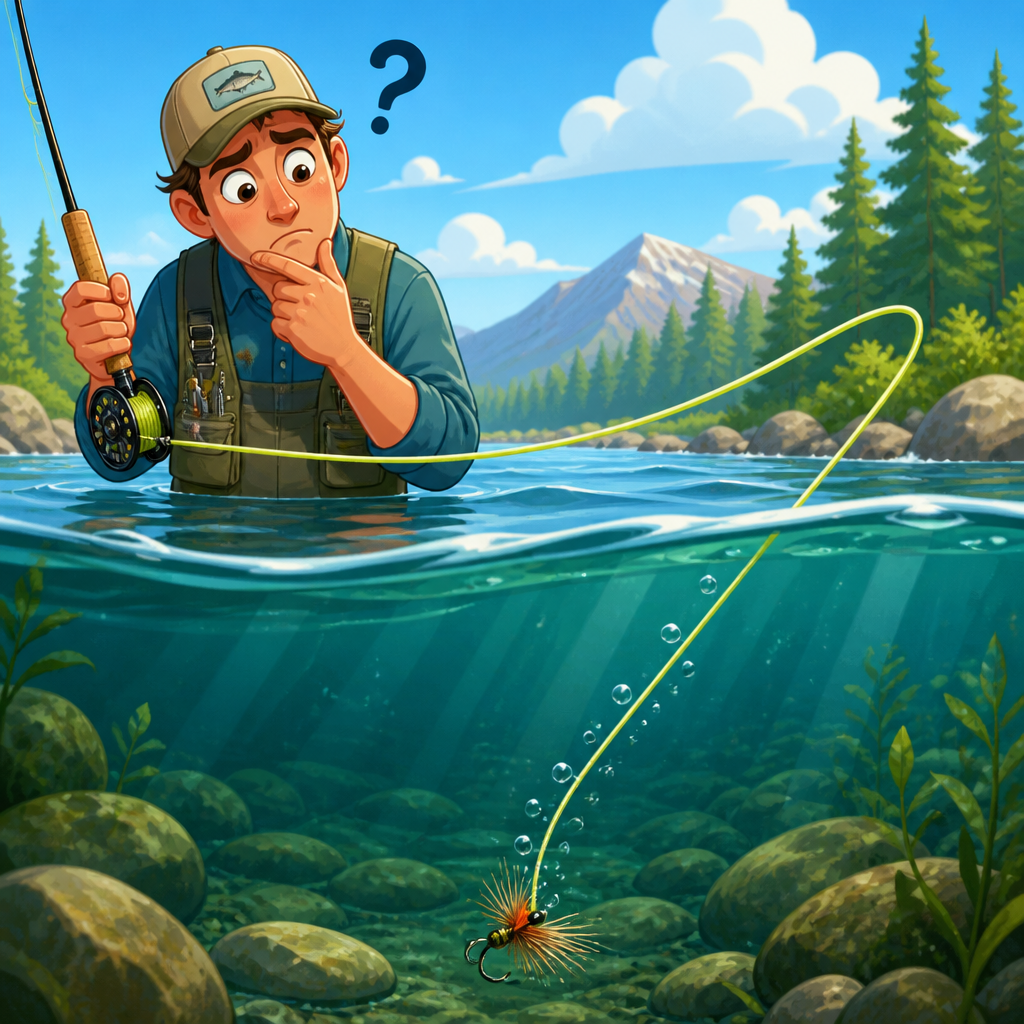
A floating fly line that rides under the surface instead of on top usually signals a problem with the line, the leader setup, the coating, or the way the gear is being used. In fly fishing basics, few issues frustrate beginners faster, because line flotation affects casting, mending, drift control, hook sets, and how well a dry fly or indicator rig behaves. When anglers ask, “Why is my fly line sinking when it should float?” they are really asking a broader gear and equipment question: what part of the system has failed, and how do I fix it without guessing?
A floating fly line is built with a low-density core and a plastic coating designed to stay on or near the surface film. That does not mean every inch of line will remain perfectly high and dry all day. Surface tension changes, algae, silt, sunscreen, line age, cracked coatings, weighted leaders, and even the current speed can pull portions of the line under. I have seen brand-new budget lines sink from contamination within an hour, and I have seen premium lines last for seasons once cleaned and dressed correctly.
This article serves as a gear and equipment hub for fly fishing basics, centered on floating line performance but connecting the full system: fly lines, leaders, tippet, reels, rods, line care, cleaning products, storage, and replacement timing. If your floating line sinks, the answer is rarely mysterious. It is usually one of a handful of identifiable causes, and each cause points to a clear solution. Once you understand those causes, you can diagnose flotation problems quickly, protect your equipment, and fish dry flies, nymph indicators, and small stream rigs with far more control.
What causes a floating fly line to sink?
The most common cause is contamination on the fly line’s outer coating. Dirt, fish slime, algae film, sunscreen, insect repellent, and stream sediment reduce the coating’s ability to repel water and hold on the surface. A clean line floats higher because the coating remains slick and hydrophobic. A dirty line absorbs grime, drags in the film, and begins to ride low. In practical terms, if the first thirty feet of your line sink while the rest on the reel still floats fine, contamination is the first thing to check.
The second major cause is physical wear. Fly lines are not solid plastic ropes; they are engineered coatings over a core. With use, the coating can crack, abrade, or soften. Once the surface is damaged, water intrusion and roughness increase. Older lines often start sinking first at the tip, where they pass through guides most often and endure the most false casting, stripping, and stepping. Tiny cracks may not look dramatic, but they create enough surface disruption to pull the line under.
Setup mistakes also matter. A heavily greased knot connection can help, but a long fluorocarbon leader attached to a lightweight floating line may pull the front section down because fluorocarbon is denser than water. Add split shot, weighted flies, a waterlogged strike indicator, or a stout Euro-style leader formula, and you can make a healthy floating line appear defective. In many cases, the line is not failing; the terminal rig is overpowering the line’s buoyancy near the tip.
How to diagnose the exact problem on the water
Start with a simple test. Strip thirty feet of line off the reel in calm water and lay it straight on the surface with no fly, no indicator, and no weighted leader attached. If the line still sinks, the issue is the line itself rather than your rig. Next, compare the tip section to the belly and running line. If only the first few feet sink, tip wear or contamination is likely. If the whole head rides low, the entire line probably needs cleaning or replacement.
Then inspect the coating by feel. A healthy floating line should feel smooth and slightly slick, not chalky, tacky, or rough. Run the line through a clean microfiber cloth. If the cloth comes away dark brown or green, you have confirmation that dirt is a major factor. Look closely near welded loops and the first ten feet for whitening, cracking, flat spots, or cuts from gravel, boot studs, or guide wear. Those marks often predict sinking before complete failure becomes obvious.
Finally, isolate the leader system. Swap to a short nylon leader and an unweighted yarn indicator or a single dry fly. Nylon is generally more buoyant than fluorocarbon, so it is a better test material when evaluating floating line performance. If the line now rides properly, your previous leader setup was the culprit. This diagnostic sequence saves money because it tells you whether to clean the line, change the terminal tackle, or replace aging gear rather than buying random products.
Common gear-related reasons floating lines fail
Not all floating lines are built the same. Entry-level lines often use simpler coatings and less durable finishes than premium models from Scientific Anglers, Rio, Airflo, or Cortland. That does not make them unusable, but it does mean they can lose flotation sooner under heavy use. Texture, taper design, and coating chemistry all influence how well a line sheds water and resists grime. Tropical lines can also behave poorly in cold trout water, becoming stiff and sitting awkwardly in the film.
Reel and rod setup can contribute indirectly. A reel with a narrow arbor and poor line management can create tight coils, and severe memory can make parts of the line cut into the surface or get dragged under by current seams. Dirty guides on the rod can scrape the coating over time, especially if grit builds inside the stripping guide. I have also seen anglers pinch lines against concrete boat ramps or truck tailgates, causing invisible crush damage that later became sinking sections.
Storage matters more than many anglers realize. Leaving a fly line in a hot car, direct sunlight, or a garage that freezes and bakes through the year accelerates coating breakdown. UV exposure, heat cycling, and chemical contact from lubricants or insect sprays all shorten service life. A line that should last several seasons can degrade in one year if stored badly. Good gear and equipment habits begin after the day on the water, not only during fishing.
| Problem | Typical Cause | What You Notice | Best Fix |
|---|---|---|---|
| Tip sinking first | Cracks, abrasion, dirty front taper | First 3 to 10 feet ride low | Clean, dress, inspect for damage, replace if cracked |
| Whole line rides low | Heavy contamination or old coating | Poor mending and sluggish pickup | Deep clean, apply line dressing, retest |
| Only sinks with certain rigs | Fluorocarbon, split shot, weighted flies | Front of line pulled under | Use nylon leader or rebalance rig |
| Random sinking sections | Heat damage, crushed coating, severe wear | Intermittent submerged patches | Replace line |
Cleaning and dressing a floating fly line the right way
The fastest fix for a sinking floating line is a proper cleaning routine. Strip the line off the reel into a clean sink, tub, or line winder. Wipe it with lukewarm water and a manufacturer-approved cleaning pad or mild soap solution if the brand allows it. Avoid harsh household cleaners, solvents, or degreasers. Those products can strip protective finishes and damage the coating. Scientific Anglers, Rio, and Cortland each provide care guidance, and following brand-specific instructions is the safest choice.
After cleaning, dry the line and apply a line dressing formulated for floating fly lines. Dressing does two jobs: it restores slickness for shooting performance and helps the line resist waterlogging from surface contamination. Apply sparingly, let it haze if directed, then buff with a clean cloth. Too much dressing can attract dirt rather than prevent it. In my experience, lines used on silty freestone rivers need more frequent wiping than lines used on spring creeks or stillwater with cleaner surface conditions.
Good maintenance is preventive, not just corrective. On a multi-day trip, I wipe the first forty feet every evening because that section does the most work. That small habit extends line life and keeps flotation consistent. If your line improves immediately after cleaning but degrades again within one outing, the coating may be nearing the end of its life. Cleaning should restore performance for a meaningful period, not only for a few casts.
Leader, tippet, and fly choices that drag a floating line down
Many anglers blame the fly line when the real issue is the leader system. Fluorocarbon sinks by design, which is useful for nymphing and subsurface presentations but not ideal when you want the front of a floating line to sit high while fishing dry flies. A long fluorocarbon butt section can pull the line tip down, especially in slow water where there is little surface tension support. Nylon monofilament, by contrast, is better for dry-fly leaders because it is more buoyant and easier to treat with floatant.
Leader length and turnover matter too. If the line is underweighted for the rod or the taper is a poor match, the cast may collapse and pile up, pushing the line tip below the film. Add two tungsten nymphs and split shot, and the front taper will dive after impact. This is not a defect in the floating line; it is simple physics. The heavier the terminal tackle, the greater the downward force transmitted through the leader connection.
Fly choice also changes results. Saturated foam hoppers still float, but deer-hair dries, yarn indicators, and some dry-dropper rigs can become waterlogged. Once the fly or indicator starts sinking, it pulls on the leader, then the line tip. Reapplying floatant, false-drying the fly, or changing to a more buoyant pattern often fixes what looked like a line problem. In fly fishing basics, understanding these relationships is more valuable than memorizing brand claims.
When repair is possible and when replacement is smarter
Minor issues are fixable. Dirty lines, light oxidation, and temporary low flotation usually respond well to cleaning and dressing. Small damage near the tip can sometimes be managed by trimming back to sound material and adding a braided loop or a neat nail-knot connection, though this slightly alters taper behavior. Welded loop failures can also be repaired. These are practical field-level solutions when the line is otherwise healthy and the core has not been compromised.
Replacement is the smarter move when the coating is cracked along multiple sections, the line has become sticky from age, the core is exposed, or random segments sink despite thorough cleaning. Once water intrudes beneath damaged coating, flotation and shootability decline together. You can keep fishing it, but control suffers. For beginners building a reliable gear and equipment system, a fresh, correctly matched floating line often improves performance more than upgrading the rod.
As a rule, frequent anglers should inspect fly lines at the start and end of each season. If you fish weekly, especially on abrasive rivers, expect heavier wear than someone who fishes ten calm days a year. Premium lines cost more, but they often deliver better longevity, slickness retention, and cold-water consistency. The right buying decision is not simply the cheapest line; it is the line that holds flotation and casting performance through your actual fishing conditions.
Building a dependable fly fishing basics gear system
The best way to prevent sinking-line frustration is to treat gear as a system. Match the rod line weight correctly, choose a quality floating line suited to your climate, use nylon leaders for dry-fly work, clean the line regularly, and store everything out of heat and sunlight. Check guides for burrs, avoid stepping on the line, and keep sunscreen and insect repellent off your hands before stripping line. Small habits preserve expensive tackle.
This hub page sits within the broader Fly Fishing Basics topic because floating-line problems connect to almost every equipment choice an angler makes. The next logical areas to explore are line weights and tapers, floating versus sinking line applications, leader and tippet material selection, fly reel sizing and drag basics, rod action and matching, and practical gear maintenance. Master those subtopics and you will solve not only flotation issues but also many casting and presentation problems that seem unrelated at first.
The key takeaway is simple: if your fly line is sinking when it should float, start with contamination, wear, and rig balance before assuming the line is defective. Clean it, inspect it, simplify the leader, and test methodically. Most causes are easy to identify, and each has a clear fix. Build better care habits, make smarter gear choices, and your floating line will perform the way it was designed to. Use this page as your starting point, then keep refining the rest of your fly fishing equipment system.
Frequently Asked Questions
Why is my floating fly line sinking even though it is designed to stay on the surface?
A floating fly line usually starts riding low or slipping under the surface because something is interfering with the buoyant coating that is supposed to keep it on top. The most common cause is contamination. Dirt, algae, fish slime, sunscreen, bug spray, and even fine grit from the bank can build up on the line and make it lose its ability to float properly. When that coating gets dirty, the line can become waterlogged on the surface and start behaving more like an intermediate line than a true floater.
Another common issue is wear. Over time, the outer coating on a fly line can crack, scuff, or flatten, especially in the first 20 to 40 feet that get cast and handled the most. Once the coating is damaged, the line may no longer trap enough buoyancy to stay high in the film. Age also matters. Older lines can stiffen, break down, or lose the slick finish that helps them ride on top and shoot cleanly.
Setup and conditions also play a role. A long, heavy leader, water-soaked yarn indicator, split shot, or multiple flies can pull the front of the floating line under, especially in current. In rough water, fast riffles, or when fishing downstream, even a good floating line may get dragged under briefly by tension or current pressure. Sometimes anglers think the line itself is defective when the real problem is that the leader and terminal rig are overpowering the floating section near the tip.
In short, if your floating line is sinking, check four things first: cleanliness, coating condition, rig weight, and water tension from the way you are fishing it. Most flotation problems trace back to one of those areas.
How do I know whether the problem is my fly line, my leader setup, or the way I am fishing?
The easiest way to diagnose the issue is to isolate each part of the system. Start by stripping out a few feet of the fly line with no leader tension on it and lay it on calm water. If the bare line itself sits low or begins to sink in sections, especially near the tip, the line likely needs cleaning, dressing, or replacement. If it floats well on its own but sinks once the leader and flies are attached, then the problem is more likely in the rig.
Look closely at your leader setup next. Long leaders made from dense material, heavily knotted butt sections, sinking poly leaders, split shot, tandem nymph rigs, and saturated strike indicators can all pull down the front of a floating line. Even a dry-dropper rig can do this if the dropper fly is too heavy or the indicator is too waterlogged. In many cases, anglers are using a floating line correctly, but their leader system is effectively designed to sink.
Technique matters too. If you cast downstream and let the current come tight against the line, the line can get dragged beneath the surface film. Excessive line mending, rod tip pressure, or stripping the line under tension can also make it dive. On stillwater, a floating line may seem to sink when it is actually being pulled under by a retrieved fly or by the angle of the rod tip held too low.
A practical test is to fish the same line with a short, simple dry-fly leader and one lightweight dry fly. If the line suddenly behaves normally, your floating line probably is not the core problem. If it still sits under, especially in patches or at the tip, that points much more directly to a dirty, damaged, or worn-out line.
Can a dirty or damaged fly line really lose enough buoyancy to sink?
Yes, absolutely. A floating fly line depends on its outer coating to stay buoyant and ride high on the water. That coating is engineered to float, but it also takes constant abuse. Every cast, every haul, every strip through the guides, and every day on muddy or sandy water adds wear. Once the surface becomes coated with grime or starts breaking down, flotation drops noticeably.
A dirty line often feels tacky, rough, or less slick than it used to. It may also stop shooting well, collect more debris, and appear dull instead of glossy. Those are all signs that the surface is compromised. Dirt and oils do not necessarily make the line sink like a stone, but they do increase surface drag and reduce its ability to stay high in the film. The result is a line that rides lower, sticks to the water more, and may slip under in places where it used to float cleanly.
Damage is even more serious. Cracks, nicks, abrasions, and flattened sections can allow water to interact with the line differently and reduce performance. In some cases, the line core or underlying structure becomes exposed, and that section may no longer float properly at all. If the line tip is the most worn area, which is common, anglers often notice the first few feet sinking while the rest of the line still floats.
The good news is that many flotation issues improve with basic maintenance. Clean the line with a product made for fly lines or with the manufacturer’s recommended method, then apply line dressing if appropriate. If the line still sinks in the same places after cleaning, or if you can see visible cracks and wear, replacement is usually the best solution. A floating line in poor condition affects much more than buoyancy; it also hurts casting, mending, drift control, and strike detection.
What can I do to make my floating fly line float better on the water?
Start with cleaning. This is the first and most effective fix for many anglers. Use a proper fly line cleaner or the line maker’s recommended cleaning method, and wipe the line thoroughly with a clean cloth as you strip it through. Focus especially on the front portion of the line, because that is where dirt buildup and wear usually show up first. Once clean, a compatible line dressing can help restore slickness and improve how high the line rides.
Next, simplify and lighten your terminal setup if flotation is still a problem. Use a leader appropriate for the technique, avoid unnecessary hardware, and remember that indicators, split shot, and weighted flies all affect how the front of the line behaves. If you are fishing dries, make sure your leader is not accidentally set up like a subsurface rig. If you are fishing indicators or nymphs, understand that the line may still be a floater, but the front end can get tugged under by the rest of the system.
Adjusting how you fish also helps. Keep better line control, reduce downstream drag, and avoid burying the rod tip toward the water when you want the line to stay high. In moving water, mend early and with less force rather than allowing tension to build and pull the line under. In stillwater, raise the rod tip enough to keep a better angle when retrieving. Small technique changes can make a floating line behave much more like it should.
Finally, be realistic about line age and condition. If the line is old, cracked, or heavily worn, no amount of dressing will restore full performance. Floating lines are consumable gear. If the coating has broken down, replacing the line may be the only reliable fix. A fresh, properly matched floating line often solves problems that anglers have been blaming on casting skill or water conditions.
When should I replace a floating fly line instead of trying to clean or treat it?
You should think seriously about replacement when the line continues to sink after a thorough cleaning, especially if the sinking is consistent in the same sections. A line that only needed maintenance will usually improve noticeably once dirt and residue are removed. A line that remains low in the water, feels rough, or performs poorly after cleaning is often worn beyond easy recovery.
Visible damage is another clear sign. If you see cracks in the coating, rough spots, peeling, severe abrasions, or areas where the diameter looks flattened or irregular, the line is no longer functioning as designed. Those problems affect not just flotation, but also casting smoothness, line memory, mending, and durability. Once the coating is compromised, the line rarely returns to full performance for long.
Age and use matter as well. A heavily used fly line that has seen multiple seasons of frequent fishing, especially in dirty water, sun, heat, or abrasive conditions, naturally loses performance over time. Some anglers hold onto old lines longer than they should because they still technically cast, but a worn floating line can quietly create a long list of problems: poor drift, harder roll casts, sticky pickups, weak hook sets, and line sections that ride under when they should be floating high.
A good rule is this: if the line is clean, matched correctly to your rod and fishing style, and still will not float the way a floating line should, replacement is justified. For beginners especially, a fresh, healthy line can remove a major source of frustration and make dry-fly fishing, indicator fishing, and basic line control much easier. Sometimes the most cost-effective fix is simply retiring a line that has reached the end of its useful life.